linkedin2 twitter2 facebook2 instagram youtube plus lock envelope money tool chatbubble

The Complete Guide for Concrete Curing and Sealant
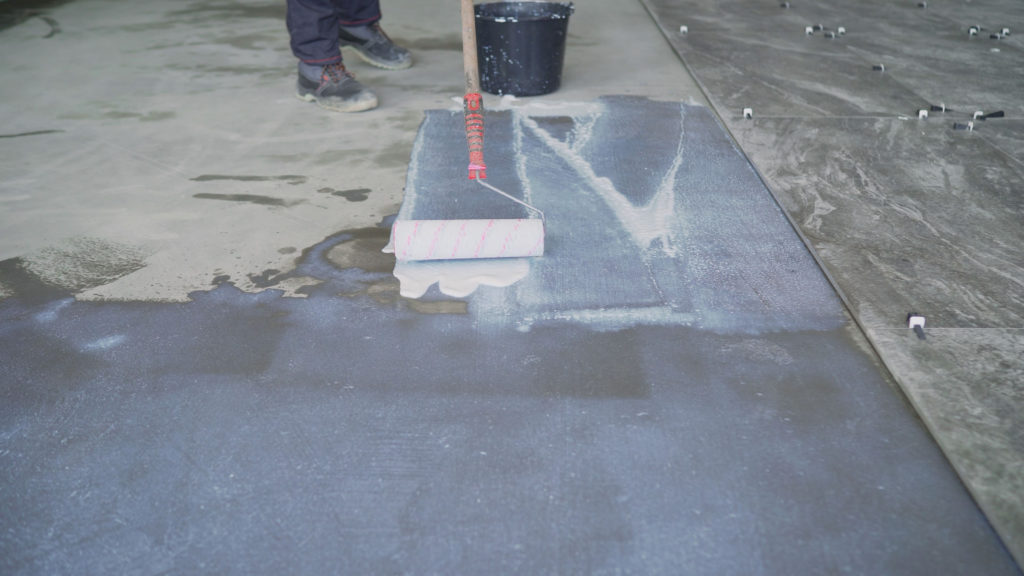
The Complete Guide for Concrete Curing and Sealant

Concrete is the cornerstone of the majority of modern buildings and other structures. It provides strength and durability but requires occasional maintenance to avoid any cracks, staining, or other deterioration. Concrete sealant is a huge part of ensuring concrete stays damage free and lasts for as long as possible.

What concrete sealers are used for

Despite its high strength, concrete is very porous, allowing it to readily absorb water and soluble salts, both of which can cause it harm. If your concrete is reinforced with steel, then that water and salt can also lead to rust and corrosion. Concrete sealers act as a barrier between concrete surfaces and structures and outside substances that will accelerate wear.

Here are the top benefits of using concrete sealant: 

  • Prevent cracks – When it comes to concrete surfaces, especially driveways, roads, walking paths, and other outdoor structures, snow, water, and frost can enter the pores and create cracks.
  • Avoid moisture – In addition to cracking, constant moisture can lead to the growth of molds and moss, which can weaken the concrete.
  • Keep colors from fading – When it comes to patios or driveways, using concrete sealers will help them retain their fresh look and even give them a shiny and vibrant appearance.
  • Resist stains – Concrete sealant helps you prevent permanent stains to outdoor surfaces, as it keeps the staining substance out of the concrete’s pores.
  • Concrete lasts longer – Using concrete sealers extends the life of your concrete structure or surface and is much more cost effective than needing to reconstruct it more often.

Concrete curing methods 

Concrete curing is another crucial step for improving its strength and durability. The process involves keeping your concrete damp and warm after initially setting it or after removing the formwork. Doing so will ensure the proper chemical reaction between the water and concrete takes place, allowing it to effectively hold together after driving.

There are several concrete curing methods available to you:

  • Water curing through ponding, sprinkling, or immersion
  • Covering with wet burlap, plastic film, or reinforced paper
  • Using a membrane forming curing compound or cure-and-seal products

Water curing is the most common method used and makes it easy to maintain the necessary moisture and temperature levels. Membrane curing, or covering with a physical barrier, is ideal for concrete curing in remote places or areas where sufficient quantities of water are not available. Using a cure-and-seal product forms a membrane film over your concrete surface, helping it maintain adequate temperature and moisture. However, a concrete sealant should still be used once the concrete is cured.

Common concrete curing issues

The common issues with concrete curing result from timing, the amount of water, and the temperature. When it comes to timing, you should begin initial curing using a fogging method right after concrete placement. Waiting too long will allow the concrete to dry out, leading to a pattern of fine cracks called crazing. Using too little water can also create crazing, while using too much will keep it from drying. The amount of water needed will vary based on temperature and humidity levels, but the concrete should remain damp throughout the curing process.

Another concrete curing issue is maintaining the right temperature. As fresh concrete gets cooler, the hydration reaction slows down. The temperature of the concrete is what’s important here, not necessarily the air temperature. Below about 50 °F, hydration slows down a lot; below about 40 °F, it essentially stops. Hot concrete, on the other hand, can lead to too fast hydration and cracking. Plus, you may experience white “powdering” if the temperature is too low or the humidity too high.

The best way to avoid any issues is to keep the concrete damp for about seven days and between 50 °F and 85 °F. The concrete should be fully cured after 28 days.

Comparison of sealant and concrete curing products

At McCann, we carry a variety of concrete curing and sealant products, and our team will help determine the best one for your specific project. Choose from the top brands in the industry, including Butterfield Color, Euclid Chemical Co., and Prosoco.


Checklist for Cold Weather Operation

Use the best fuel.

Make sure you are using high quality winter diesel fuel. The fuel conditioner should match the type of fuel you are using (e.g., low sulfur) and should be approved by manufacturer.

Check starting devices
Check to make sure block heaters and cold weather starting devices are working properly.

Warm up the machine
Let machines come up to operating temperature before working.

Keep a spare fuel filter
Keep an extra fuel filter in the cab, but follow installation instructions in your operator’s manual.

Check ice build up
Check for Ice or snow build up in exhaust or intake if applicable. Inspect and clear Ice or snow build up from throttle, and brake area.

Warm up to improve steering response
Steering response on equipment with hydraulic steering may become very slow at low temperatures, even when the correct oils are used. Once the engine is started, let the machine idle until the engine reaches operating temperature.

Safety first
Mount and dismount your machine using three points of contact. Remember that you are working with snow and ice; slips and falls are a common cause of injuries. Wear your seatbelt when operating equipment and stay alert.

For Idle Machines

  • Start once a month, when temperature is  above freezing.
  • Avoid starting a machine in extreme cold weather.
  • Operate hydraulics for a brief time.
  • Do not try to break crawler type machines from  a badly frozen situation. It can result in power  train damage.
  • Test batteries, and use proper procedures if  a unit needs to be started with an assist devise  or jumper cables.

Summer Cooling System Best Practices

An engine's cooling system protects it from over heating and keeps it operating at optimal temperatures. If the cooling system is not maintained properly, it must work harder to prevent the engine from overheating. As a result, your machine will not operate as efficiently and internal components could be damaged. It is estimated that cooling system problems are responsible for 40% of all downtime.

Follow these maintenance tips to ensure optimal performance and reduce downtime.

Check Cooling Fans

The cooling fan is part of the cooling system and must be inspected regularly. Look for loose or damaged fan blades. Cracks or nicks in the fan blades can cause the fan to become out of balance and vibrate, which can destroy water pump bearings and other related components, eventually leading to total system failure. Also, inspect the fan for excessive debris buildup and clean regularly. The debris can cause the fan to disengage and blow a system fuse.

Clean Radiator and Coolers

It is very important to power wash the radiator and cooler every few days, especially during hot weather. Humidity and dust buildup will coat radiators, air coolers, and oil coolers. This buildup cuts down on airflow and heat transfer significantly. As a result, operating temperatures increase dramatically and cause the engine to overheat and, ultimately, shut down.

Analyze Coolant

Coolant that appears cloudy or has floating particulates could be an indication of corrosion, cavitation and rust. Regardless of coolant type, all coolants should be clear. Inspect the inside of the radiator for corrosion, and check the coolant for signs of rust or debris. Follow the manufacturer's recommended drain intervals. At a minimum, coolant should be drained and flushed annually.

It is important to perform a coolant analysis because half of all water pump failures are caused by a concentration of antifreeze that is too high for the cooling system. Test the additive concentrations with a coolant analysis test by taking a sample and submitting it for analysis. The recommended interval for testing is 1,000 hours. McCann has sample kits available that are easy to use.

Replace Hoses & Clamps

Frequently check the condition of your coolant hoses & clamps. As the temperature rises in the cooling system, the hoses and clamps expand and contract at different rates. This expanding and contracting of the hoses and clamps, repeated over and over, causes the hose-to-neck seal to wear. Inspect all radiator and heater core hoses and lines for excessive softness or hardness, and check for cracks and leaks. Be sure all the connections are tight to avoid water leakage and hydraulic hose failures. Replace hoses every two years.

Machine Winterization

Follow these best practices to make sure your machine is ready for winter.

  • Check chain tanks, final drives, swing gear baths and gear boxes for water. Check the label to make sure you’re using coolant that complies with ASTM standard D-621, with a freeze point low enough for your climate. If coolant freezes, it can crack the engine block and ruin the engine.
  • Add fuel conditioner.
    Fuel conditioner prevents your fuel from freezing and makes sure your engine starts in the cold. Check the manufacturer’s recommendations for the amount of conditioner required. Match the fuel conditioner to the type of fuel you’re using (e.g., low sulfur).
  • Check the fuel filter.
    If the fuel filter is clogged, moisture can build up and freeze in the winter, causing your machine to run improperly or fail to start. Empty the water traps in the filters before cold weather arrives. To avoid downtime, keep an extra set of fuel filters in your cab.
  • Check cold start aids. Diesel engines spray ether into the air system to help the engine start in cold weather. For older machines that have ether spray bottles, check the bottle to make sure it isn’t empty. For new machines with an automatic ether system, inspect the connections and hoses for cracks or loose connections.
  • Check the block heater.
    Block heaters keep fluids at the right temperature and viscosity. If it isn’t working, the oil can thicken, so it’s harder to turn the engine over and adds stress on the battery. Plug in the block heater to check it, then touch the hoses to make sure they are warm.
  • Inspect air pre-cleaners.
    Large dust particles and debris can build up during the summer and should be removed. Otherwise, snow and ice could collect around them, allowing moisture into the air system, which could cause engine failure.
  • Check battery and connections.
    Corrosion around battery connections causes less voltage to be transmitted, and increases the strain on the battery. Corroded connections can drain the battery, preventing your machine from starting. Periodic inspections for corrosion reduce the chance of having a drained battery.

Winter Storage

  • Top off the fuel tank if possible.
    If you have a diesel engine, leave it completely full during winter months to eliminate the possibility of condensation forming in the fuel tank and spreading. Condensation can clog the fuel filter, which can clog fuel lines, carburetors, and injectors.
  • Run the engine after cleaning.
    Run your machine’s engine after cleaning the engine and replacing the oil so that a protective film of oil coats the internal parts. The oil coating acts as a rust preventative. Pour a 50/50 mixture of water and antifreeze into the coolant system before running as well to protect the cooling system to -34°F.
  • Clean & fully charge batteries, then disconnect the power leads.
    Never store discharged batteries. Colder temperatures slow the discharge rate of fully charged batteries.
  • Start machines once a month.
    Avoid starting the machines in extreme cold weather. Find a time when temperature is above freezing to start the machine and operate the hydraulics for a brief time.
  • Do not try to break crawler type machines from a badly frozen situation. The result can be power train damage.

Cold Weather Operation

  • Protect your machine.
    If you can’t keep your machine inside when it’s not in use, at least keep a weather resistant tarp over the engine. With snow comes condensation, which can cause problems for the entire engine.
  • Manage productivity.
    Cold weather makes the earth harder, and frost can penetrate roadways and aggregates to make utility, road, and crushing jobs much more difficult and time consuming. Winter months have less daylight, so manage your time wisely.
  • Keep the job site clean.
    It is imperative to keep jobsites neat and clean during winter months. When not working, leave a layer of snow on the ground to keep frost from penetrating the ground – the snow will actually insulate the ground beneath. When working, make sure to clear all snow and ice to avoid accidents.
  • Clean areas designated for snow removal.
    Clean up debris or equipment that will be hidden by fallen snow. Mark any areas of concern with reflective stakes so snow removal crews can easily identify & stay away from those areas.
  • Plan for earthworks projects.
    Frozen chunks of ground need to be placed in designated areas. The frozen chunks of earth contain water that can cause major problems in the spring, such as sink holes.
  • Use the best fuel.
    Make sure you are using high quality winter diesel fuel. The fuel conditioner should match the type of fuel you are using (e.g., low sulfur) and should be approved by manufacturer.
  • Check starting devices.
    Make sure block heaters and cold weather starting devices are working properly.
  • Warm up the machine.
    Let machines come up to operating temperature before working.
  • Keep a spare fuel filter.
    Keep an extra fuel filter in the cab, and follow installation instructions in your operator’s manual.
  • Check ice build up.
    Check for Ice or snow build up in exhaust or intake if applicable. Inspect and clear ice or snow from throttle and brake area.
  • Warm up to improve steering response.
    Steering response on equipment with hydraulic steering may become very slow at low temperatures, even when the correct oils are used. Once the engine is started, let the machine idle until the engine reaches operating temperature.
  • Stay aware of safety.
    Mount and dismount your machine using three points of contact. Remember that you are working with snow and ice slips and falls are a common cause of injuries. Wear your seatbelt when operating equipment and stay alert.

Dealing with Changing Tire Pressure During the Winter

Underinflated tires are a drain on your business. Low tire pressure increases fuel usage and wear. Follow these best practices to get optimal performance from your equipment.

Check tire pressure regularly
You can't check tire pressure with a visual inspection. Many tires will look properly inflated even if they're not, which is why it's important to check regularly with temperature changes. In the winter, check tire pressure weekly. The best time to ensure an accurate reading is before you operate the machine or three hours after shutting down. A general rule of thumb is that 10° F air temperature change correlates to a tire pressure change of 1 psi.

Measure tire pressure at the working temperature
Don't measure tires in a warm shop if you'll be working in the cold. Make sure you're taking accurate tire pressure readings in the setting that the equipment will be used.

Inflate tires with nitrogen
To combat pressure fluctuations, consider using nitrogen to fill your tires. There's no added risk of combustion or fire and it prevents ice crystals from forming that could hold open the tire's valve stem. When inflating your tires with Nitrogen, continue to fill the tire to the manufacturer's recommended psi.

Slowly roll tires if they have been sitting for long periods in cold weather
When first using a machine after it has been parked, gradually move the machine at first. Cold temperatures can cause the contact surface of tires to go flat against the ground and this will allow the tires to return to their correct shape.

As temperatures warm, continue to keep an eye on tire pressure
Don't let your tires over inflate as temperatures increase. Faster, irregular wear can occur, shortening the tire's life. Measuring tire pressure regularly throughout any temperature fluctuation ensures you'll be working at optimal pressure.

CTL and Skid Steer Operation

The versatility of skid steer and compact track loaders makes them a staple on almost any jobsite. Follow our best practices to make sure you are getting the most out of your equipment by completing work efficiently and safely.

Always wear your seatbelt

Rollover accidents are a leading cause of injury and death in CTLs and skid steers, often because the operator wasn’t wearing a seatbelt. Even if your equipment features a ROPS system, seatbelts are an important component to assure safe operation. No matter how light the load or how short the distance, fasten your seatbelt before you begin operation.

Don't travel across slopes

If you need to go up or down a slope in your machine, make sure the heaviest end is positioned uphill and travel in a straight line up and down. This position maximizes stability and greatly decreases the risk of rollovers. When no load is being carried, the rear of the machine is usually heavier.

Never leave the operator's station while the engine is running or when the arms are raised
Another leading cause of injury or death involving skid steers and CTLs is hitting or crushing someone with moving parts. Buckets can unexpectedly lower or loads can be dropped without notice. Never start the machine or make adjustments from outside the cab, and never allow someone walk under raised arms.

The proper technique for stopping the machine is:

  • Lower the arms and attachment flat on the ground
  • Stop the engine and remove the key, or lock the keyless panel
  • Engage the parking break
  • Move the controls until they are locked or in a neutral position

Never transport personnel in the bucket or on attachments

No more than one person should ever be involved in operating a skid steer or CTL. Falling off these machines can result in serious injury or death. Never lift the hydraulics or drive a machine with another person riding along the outside of the machine.

Attachment Maintenance

Keep Costs Down by Extending the Life of Your Attachments

Hydraulic Hammers

Complete a Regular Three Part Inspection

  1. Check for leaks in the attachment’s fittings or hoses
    Prior to use, inspect hoses for cracks and check that shielding is in place. Make sure your fittings are not loose and your hoses and fittings are free of contaminants.
  2. Inspect critical points for proper lubrication and function
    Power wash the attachment to remove dirt, sand or other contaminants. Once clean, follow the manufacturer’s guidelines for proper special grease or oil lubricant requirements for proper bushing wear. These contain special agents designed specifically for manufacturers’ units, and standard grease is not acceptable for most hammers.
  3. Make sure the locking mechanism is operating correctly
    The locking mechanism should not be stiff or bent to ensure proper locking and unlocking of the attachment. Check for damage whenever attachments are changed. Never pry with tool while operating.

Best Practices

  • Keep hydraulic hose ends out of the dirt
  • Make sure your hammer’s in and out ports are closed on the jobsite – dust and sand can easily enter if left open
  • On a weekly basis, or every 10 hours, remove and inspect the retaining pin and tool
  • On a monthly basis, or every 50 hours, inspect the tool shank and bushings, carefully checking for wear
  • Every 50 hours, inspect hydraulic hoses
  • Hammers should be serviced annually or every 600 hours

Buckets & Teeth

Bucket Inspections

Buckets require extra care – a well maintained bucket can cut down on costs by digging and breaking out more efficiently, which reduces fuel consumption and increases the rate of job completion. Prior to use, carefully check the following parts of your bucket:

  • Mounting Hinges
    Inspect for cracks. A small crack can quickly become much larger – if you see any cracks, get them fixed immediately.
  • Front Leading Edges and Corners
    Visually check to see if they are getting thinner or if there are signs of cracking. If so, the corners can be re-plated and thickened to increase the life of the bucket. If left unchecked, the corner could fail during heavy digging and the bucket edge can be torn out completely and would have to be replaced.
  • Bucket Edges
    Any signs of distress? If so, can it still be serviced? If you are working with a bucket with reversible edges, you may want to consider rotating them.
  • Bucket Teeth
    Check if they are worn or need rotating. Teeth that are regularly rotated last longer, saving you money. Corner teeth tend to wear faster – move them to the center to increase their life. Many styles of teeth can be turned upside down – the lower edge wears faster and if they are turned over they will wear more evenly.
  • Lost Teeth?
    Do not use a bucket with a missing tooth. Not using a full set of teeth will wear away the adapter nose and result in poor contact when new teeth are installed.
  • Correct Bucket Teeth?
    There are a wide range of bucket teeth that can be used for a variety of applications – make sure you have the correct teeth for the job, such as penetration teeth for rock or abrasive teeth for coal.
  • Lubrication
    Is the bucket properly greased? Insert some lubrication into the proper bucket pin locations. Simple lubrication is the cheapest and best form of maintenance. Also,
  • Check pins and bushings for wear at this time
    Worn pins & bushings cause more stress on the machine, and rapidly lead to expensive and more in depth repairs when let go too long. Also, worn pins & bushings result in less control of the machine during operation.

Maintaining Your Compact Excavator

Daily Checks

One of the simplest—yet often overlooked—maintenance practices is the daily walkaround checklist. Be sure to check the engine oil, hydraulic fluid and coolant and top off when necessary. Make sure that you’re using the manufacturer-recommended fluid. Remember, it never hurts to ask your dealer or your tech. After a week or so, it is important to check the fuel filter and drain any water or debris that may have built up, or replace it if necessary. Next, check the hydraulic hoses and air system for leaks—its always better to find a problem and fix it while it’s small, than to wait until it’s too late.

Get out the Grease Gun

Next, check all pivot points on the machine and grease where needed. You should also check the track tension—always check your operator’s manual for the proper technique. Something that is often completely overlooked is the bucket or attachment. Be sure to check all the pivot points on the attachment as well, and grease where needed. Also, take a look at the teeth on the bucket. If they are worn down to a certain degree, that can have a serious effect on the machine’s performance. If the teeth are worn and dull, the machine has to work a lot harder to get the job done, and there’s no reason for the added wear-and-tear on the machine. If you aren’t sure, ask your dealer or tech.

Cooling System

It is important to keep the radiator, oil cooler and other heat exchangers clean during operation. Check for any accumulated debris, and wipe down when necessary. Remember, slow oil or coolant leaks tend to collect dust and other particulate matter—keep an eye out for potential problem areas during your daily checks.

Special Maintenance Features

Many modern excavators offer special features that allow for easier maintenance. Easy access is crucial when it comes to quick maintenance checks—all of our excavators feature a well-designed engine compartment and access panels. You should be able to access and locate components easily and safely. Another great feature on our newer excavators is a multi-function monitor in the cab. This electronic panel offers important performance readouts, and will let an operator know when fluid levels are low, or when maintenance is required.

Check the Manual

You probably hear this a lot, but it is really important to use OEM filters and manufacturer-recommended fluids and fuel. The machines where developed and tested using these fluids and filters, and any difference in specs can affect the performance of the machine.
Be sure to check your operator’s manual and make sure that you are keeping up with the regular service intervals. Your technician will be sure to check the belt tension and alignment, keep up with the proper oil and fluid changes, and keep the cooling system running properly. Ask your dealer or tech about regular service intervals—again, it’s always better to stay on top of things

Hydraulic Hose

Choose the right hose

When choosing a hydraulic hose you should pay close attention to the following characteristics:

  • Working Pressure – Choose a hose that is suitable for the working pressure of the machine
  • Wire or Sheathing – Install wire or sheathing when fabricated if the hose will be used in an area exposed to damage from pinching or crushing
  • Fluid – Make sure you use a hose compatible with the fluids that are used in the machine
  • Size/Inner Diameter – Choosing the right size hose is important in order to avoid unwanted friction. When fluid rubs against the inner surface of the hose, friction is created, which creates heat, increases back pressure and reduces the rate of flow
  • Match the Fluid Viscosity to the Operating Temperature – In order to achieve maximum component life, the fluid’s viscosity grade should be correctly matched to the operating temperature range of the hydraulic system

Keep your hose operating correctly

Follow these maintenance tips to ensure optimal performance and reduce risks, labor costs, and downtime

Pre-Use Inspection – To be completed before each use

  • Check hydraulic hoses for signs of deterioration – Look for indications of wear, such as cracking, blisters and bubbles. Catching signals early helps avoid hose failures later on
  • Inspect seals used in fittings and adapters – Seals wear down, harden and age with regular use. Check for signs of wear and replace as needed
  •  Timeframe for replacement varies – There is no set time to replace hydraulic hoses. Rate of deterioration depends on a variety of factors including usage, pressure, and the type of hydraulic liquid
  • Semi-Annual Maintenance Checks – At a minimum, hydraulic hoses should be thoroughly inspected by a certified technician every six months

Storage and Safety Tips

  • Keep fittings clean – Avoid getting sand, dirt or other substances on your fittings and clean before each connection
  • Use caps and plugs when not in use – Use of caps or plugs on your hydraulic hoses keeps them clean and saves time later when you have to re-attach them
  • Store in the shade – Keep hoses stored out of direct sunlight. The sun accelerates deterioration and high pressures can result when the oil expands in the hose, making connection more difficult
  • Detach carefully – A pressure relief tool is the best implement to remove a pressure-locked hose. Do not hit hoses on the floor to release pressure
  • Always wear safety goggles when working with hydraulic hoses

What if a hose fails?

Usually hoses fail due to misapplication, deterioration or improper maintenance. If the hose fails, be extremely careful:

  • Shut down the machine immediately to avoid additional damage
  • Allow machine to release pressure – Pressure is not released immediately and machines need time to release pressure to a level suitable for a proper inspection
  • Do not search for the leak using your hands – Hydraulic fluids can penetrate the skin and pose a significant risk to your health
  • Carefully replace the hose and test for proper operation

Please contact your local service manager with any questions on hydraulic hoses or to schedule an inspection.

Fuel Usage

When using heavy machinery, certain practices can help reduce overall fuel consumption and costs. The following tips may help you save hundreds of dollars each year.

Inspect air filters regularly

Inspect your air filters every 50 hours to ensure maximum operating performance. If the pleats of your filter are clogged with dirt, it is time to change the filter. We do not recommend cleaning the air filter, which can damage it.

Changing your air filters regularly is the most simple and cost effective way to decrease fuel costs. When an air filter becomes clogged with dirt, the engine cannot get the air it needs and does not operate efficiently. Some machines have air flow indicators that tell you when it is time to change the filter. If you wait until you see a warning, however, you have probably been wasting fuel.

Grease fittings properly

Lubricate your machine according to manufacturers recommendations. By keeping your machine properly lubricated, fuel efficiency is increased simply because the power needed to perform operations is reduced. The more mobility the components have, the less work the hydraulic system must perform.

Check tire pressure

Check tire air pressure before and after each use. If the tire pressure is low, fill the tires as soon as possible. Low air pressure can reduce the efficiency of your machine and lower fuel efficiency. Checking tire air pressure is easy and costs nothing.

Be alert for signs of a mechanical problem

When you see signs of a mechanical problem, such as excessive black smoke, bring your machine in for repair before the problem gets worse. Mechanical problems, such as a bad fuel injector, can significantly reduce fue efficiency. If your fuel injector is overfueling a cylinder, your machine is wasting fuel.

Run your engine at low RPM when possible

Begin by running at a low rpm during operation, then slowly raise the rpm until the engine does not strain. This level will be the most efficient and effective rpm for the job. When a job does not require maximum power, running the engine at a lower rpm can significantly reduce fuel consumption.

Service your equipment regularly

Follow the manufacturer’s guidelines for servicing your equipment. Most require service at least every 500 hours. Fuel efficiency is affected by many different components. The best way to ensure that your machine is working efficiently is to service it regularly.

Staying Warm in Cold Temperatures

During the winter months, it’s important to stay warm when working outdoors in cold temperatures to retain body heat and avoid hypothermia and frostbite. The following best practices will help you and your team operating in the winter.

Prepare your equipment

Air Filters

Check, and if necessary replace, air filters in the cab to improve your heater’s effectiveness. Also, make sure that snow or ice isn’t blocking any airways.

Radiator

Cover the radiator intake to help the machine warm up faster. Don’t operate the machine until the engine has reached operating temperature to reduce the chance of damage.

Engine Block 

Plug in engine block heaters at night for each machine to avoid problems and service calls.

Wear the proper gear

Coveralls

Thermal insulated coveralls are essential for anyone who is working outdoors in the winter. They are designed to maximize body heat containment while allowing a wide range of motion. If coveralls aren’t an option, look for thermal long underwear to help keep in body heat.

Helmet Liners

Worn under a hard hat, these liners keep your head and neck warm. Fleece lined fabric is the most popular choice because of its comfort and insulation levels. Keep spares on hand and remember to wash them regularly for the best results. Maintain a stable center of gravity at all times.

Proper Gloves

Glove selection is crucial to balancing warmth with dexterity. Make sure the fabric and textures are suited to your job and consider gloves that work with a liner. They may be a little oversized, but they allow increased protection.

Thermal Socks and Insulated Boots

Standing or walking on cold surfaces for long periods of time can quickly decrease your core body temperature. Double layer socks and boots designed for cold weather can make a big difference.

Optimize the environment

Ground Barriers

Where possible, stand on mats, plywood or other barriers if you’ll be working outside for long periods of time. These materials act as installation to help decrease the amount of body heat lost to the cold ground.

Portable Heaters

There are many types and sizes of heaters that help keep workers warm. Rent or purchase heaters for outdoor projects to increase worker productivity.

Watch for these symptoms

Keep an eye out for the following symptoms of over exposure.

Hypothermia

  • The body stops shivering
  • Breath becomes shallow and slow
  • Victim will suffer from memory loss and confusion as well as exhaustion
  • Speech may become mumbled and slurred
  • Extremities will loose coordination causing stumbling and fumbling
  • Pulse will slow down and become weak
  • In severe cases unconsciousness can follow without breathing or a pulse

Frost Bite

Initial signs of frostbitten skin include

  • A change in color to white, grey-yellow, or dark and black
  • A texture that is hard and waxy feeling
  • Numbness
  • Blisters

During rewarming and healing the skin may

  • Swell and become painful
  • Burn and itch

Skin damaged by frostbite can suffer from long-term numbness. In some cases, the tissue dies requiring removal of the body part.

Radiator Care

Never open or inspect the radiator while the engine is running or the system is hot

Personal injury can result from hot, pressurized coolant. Always shut off the engine and allow the radiator to cool before examining the system or beginning any work.

Keep coolant fresh

It’s estimated that 40%-60% of engine failures are coolant related. These failures either are related to using an improper coolant or to topping off the system with the wrong product. Keep careful records to make sure you’re changing the fluid at factory recommended intervals and not mixing coolants.

Remove blockages daily

Check your radiator screen daily during warm weather for dirt, grass or other debris. A clear screen will help your machine stay cool and assure maximized performance.

Clean radiator cores

Use compressed air to blow debris from the cores. If material remains, you can use high pressure water or steam to remove dust and debris, but compressed air is preferred.

Inspect the radiator cap for damage

When the radiator is cool, slowly remove the radiator cap to reduce system pressure. Inspect the cap for damage or deposits of material. If any cracks or damage are visible, install a new cap. Otherwise, clean and close the cap firmly.

Be especially vigilant when using hydraulic attachments

Hydraulic attachments put more stress on a machine’s cooling system than using a bucket. This stress leads to faster overheating and requires the operator to keep a close watch of the machine, especially in hot weather.

Sanitizing Equipment

Properly sanitizing heavy equipment is essential for maintaining the health, safety, and productivity of your team. Truck and machine cabs can be ideal environments for harboring and transmitting viruses and other illnesses. Despite the fact that operators are typically alone in the cab, all it takes is one mechanic, supervisor, or second shift operator to hop in there, touch a surface, and potentially be infected or leave traces of a virus.

Since the COVID-19 pandemic, many companies have a heightened sense of awareness when it comes to maintaining cleanliness. Follow these heavy equipment sanitation tips to protect your team from coronaviruses, the flu, and any other pathogens that may strike.

Find the right disinfectant

Before you start actually sanitizing your construction machines, you have to find a disinfectant that is effective at eliminating the majority of viruses without damaging your equipment interior. To avoid harming or discoloring vinyl, plastics, leather, or other surface materials, we recommend using cleaners designed for automotive interiors, not general household.

Isopropyl based cleaning products can be used to sanitize the majority of hard and interior surfaces. When using an alcohol based cleaning solution, the CDC recommends concentrations of 70% or above. Follow the instructions on the product for concentration, application method, and contact time. If you are trying to deactivate or kill a specific virus, check the EPA-approved disinfectant list for detailed descriptions of which types of cleaners to use for certain pathogens.

You should consult your owner's manual for directions on how to clean monitors, touch screens and other sensitive surfaces without damaging them.

Wear personal protective equipment (PPE)

Once you have the proper cleaning solution, it's time to move into the cab. The person handling the sanitation should always wear latex or synthetic rubber gloves and a mask or face covering. Wearing personal protective equipment will ensure the team member is shielded from the cleaning chemicals, as well as prevent them from leaving traces of a virus on the surfaces they just wiped down.

Clean all interior surfaces likely to be touched

The most important parts of the cab to sanitize are the ones that we touch a lot. Those areas should be cleaned before each new person enters the machine and typically include all handles, joysticks, steering wheels, knobs, buttons, seat belts, seat belt latches, windows, and even floor mats. Spray surfaces with the cleaner and use a highly absorbent microfiber cloth to scrub and wipe dry. For sensitive electronic or display areas, use an EPA approved contactless product, which you can spray and let dry without needing to wipe off.

Other surfaces to pay attention to

Just as important as sanitizing interior hard surfaces are exterior surfaces. Spray, scrub, and wipe all machine touchpoints, including the dipstick, gas cap, engine access points, handles, latches, and anywhere else likely to have contact.

Although it typically does not have to be sanitized as often as hard surfaces, it's a good idea to clean your upholstery at least every week, if not more frequent. You will find a variety of upholstery products at any auto parts store. If applying your own solution, avoid using anything that contains bleach, as it will cause discoloring.

Wash surfaces before sanitizing

Before using your sanitizing solution to disinfect equipment, ensure all dirt and dust are washed off. Washing before disinfecting is especially important for your machine's exterior, but also for floor mats, handles, and anywhere else that is visibly dirty. Clearing dust and debris will make the sanitation process more effective.

Fluid Maintenance

It is especially important to monitor fluid levels in your equipment during the summer months when temperatures are high. The summer heat will cause the engine to warm at a faster rate. As the engine warms, the machine’s fluids will suffer vaporization loss, eventually leading to a lower fluid level. Perform daily checks on the hydraulic fluid, coolant and machine’s oils to ensure that the equipment will not run into problems while operating.

Fluids to Check

Hydraulic fluid
Hydraulic fluid is used to transmit the force required to operate the machinery and to lubricate the hydraulic system and protect it from corrosion. Low hydraulic fluid levels will cause the machine to overheat and reduce the power of the equipment. Before checking the level of hydraulic fluid, make sure the machine is on even ground. The fluid should be kept at the level indicated on the tank’s gauge.

Coolant
Coolant keeps an engine running at peak performance in all temperatures. Coolant adds antifreeze and corrosion inhibitors, to prevent freezing, corrosion, cavitation and rust. Operating with low coolant can lead to major problems, because unprotected surfaces could sustain damage. When checking coolant levels, allow the engine to completely cool. Then, locate the coolant reservoir and fill the tank to the indicated line.

Oils - engine, transmission, gear
Engine oil is used mainly to lubricate parts. It also cleans, inhibits corrosion, improves sealing, and cools the engine by carrying heat away from moving parts. To check the engine oil level, some machines require a dipstick inspection while others require removing the fill cap to check that the oil is at the fill line or the top of the fill hole.

Transmission oil lubricates the transmission gears and helps keep the transmission operating temperatures reduced. To check the transmission oil, turn off the engine and locate the transmission dipstick. The level should be just under the full mark.

Gear oil lubricates gear teeth and helps prevent the machine from overheating. When checking the lubricant level, make sure the gear oil is at the level of the filler plug. Fluid level is critical to effective and efficient operation.

Additional Fluid Questions?

Contact your local branch with your fluid maintenance questions. Be sure to ask about fluid analysis to track contaminant levels in your equipment’s fluid, so we can predict component failure. We will provide guidance and oil change intervals, based on the results for your equipment.