We get it – uptime is everything.
That’s why we offer the know-how and resources to help keep your equipment running smoothly all day, every day:
- 24/7 on-site repair service
- Quick and accurate repairs
- Certified technicians
- 24-hour emergency service ~ Call (630) 739-7770 after hours
- We communicate with you along the way… you’ll know the status of your repair
- We work on ALL Makes of equipment
- Rent-A-Wrench, our Technician works at your site or shop under your direction

About Filters
Changing filters regularly is essential for your equipment to perform its best. Recommended intervals for filter changes vary between 250 and 500 hours. It can be tempting to select a bargain filter brand, but an inferior filter can make a big difference in the long term health of your equipment. Saving a few dollars on a filter is just not worth the damage that can be caused to your equipment by an inferior filter.
Here are the basics of filters.
Why are filters used?
Filters are used to keep fuel, oil and hydraulic fluids clean as they circulate throughout your machine’s systems, lubricating the parts and dispersing heat. There are fuel filters, engine oil filters, transmission filters and hydraulic fuel filters.
Why are filters important?
Small particles from component wear and dirt are picked up by oil and hydraulic fluids as they flow through the equipment. If these contaminants are not separated from the fluids, they could cause tremendous damage to a machine. Using the correct filters will actually help maximize machine performance and extend the life of your machine.
A filter should capture contaminants and dirt effectively and perform well during the entire interval between filter changes.
What affects a filter’s performance?
There are three components of a filter that are important.
1. The filter media
The fluids pass through filter material or media where contaminants are trapped. Naturally, what the filter media is made of is important. The material must be strong enough to last through the interval between changes. So, it must be tough and not fall apart during its lifetime.
2. Filter construction
The filter must be constructed so that it traps extremely fine particles but doesn’t get clogged and become ineffective. Inadequate capacity in a filter will trigger the bypass valve to open too early, and unfiltered fluids will enter the system.
3. Filter canister
The filter canister should be strong enough to avoid collapse under high pressure. Collapsing would permit unfiltered fluids to flow through the system.
Before you buy a filter
Ask your parts representative whether the filter you plan to purchase meets the equipment manufacturer’s requirements.
An engine’s cooling system protects it from over heating and keeps it operating at optimal temperatures. If the cooling system is not maintained properly, it must work harder to prevent the engine from overheating. As a result, your machine will not operate as efficiently and internal components could be damaged. It is estimated that cooling system problems are responsible for 40% of all downtime.
Follow these maintenance tips to ensure optimal performance and reduce downtime.
Check Cooling Fans
The cooling fan is part of the cooling system and must be inspected regularly. Look for loose or damaged fan blades. Cracks or nicks in the fan blades can cause the fan to become out of balance and vibrate, which can destroy water pump bearings and other related components, eventually leading to total system failure. Also, inspect the fan for excessive debris buildup and clean regularly. The debris can cause the fan to disengage and blow a system fuse.
Clean Radiator and Coolers
It is very important to power wash the radiator and cooler every few days, especially during hot weather. Humidity and dust buildup will coat radiators, air coolers, and oil coolers. This buildup cuts down on airflow and heat transfer significantly. As a result, operating temperatures increase dramatically and cause the engine to overheat and, ultimately, shut down.
Analyze Coolant
Coolant that appears cloudy or has floating particulates could be an indication of corrosion, cavitation and rust. Regardless of coolant type, all coolants should be clear. Inspect the inside of the radiator for corrosion, and check the coolant for signs of rust or debris. Follow the manufacturer’s recommended drain intervals. At a minimum, coolant should be drained and flushed annually.
It is important to perform a coolant analysis because half of all water pump failures are caused by a concentration of antifreeze that is too high for the cooling system. Test the additive concentrations with a coolant analysis test by taking a sample and submitting it for analysis. The recommended interval for testing is 1,000 hours. McCann has sample kits available that are easy to use.
Replace Hoses & Clamps
Frequently check the condition of your coolant hoses & clamps. As the temperature rises in the cooling system, the hoses and clamps expand and contract at different rates. This expanding and contracting of the hoses and clamps, repeated over and over, causes the hose-to-neck seal to wear. Inspect all radiator and heater core hoses and lines for excessive softness or hardness, and check for cracks and leaks. Be sure all the connections are tight to avoid water leakage and hydraulic hose failures. Replace hoses every two years.
Why Purchase Remanufactured Parts?
Cost Less
Remanufactured parts cost less that new parts, often as much as 25 – 45% less.
Same Specifications as New
When parts are remanufactured, they are completely disassembled, cleaned, inspected, re-engineered and rebuilt with new components to meet OEM specifications. All parts are tested to assure that specifications are met.
Same Warranties as New
In most cases, remanufactured parts come with the same warranty as new parts.
Faster Installation
Remanufactured parts are ready to install, so our turnaround time for installation is fast.
Environmentally Friendly
- Remanufacturing generally uses about 20% of the amount of energy required for new manufacturing.
- About one pound of new material is used for every 5 to 9 pounds of reused material.
Available Remanufactured Parts
Engines and Assemblies
Complete engines
Basic engines
Short blocks
Connecting rods
Cylinder heads
Oil coolers
Oil pumps
Turbochargers
Water pumps
Fuel
Injection nozzles
Injection pumps
Electrical
Alternators
Generators
Starters
Hydraulics
Power Train
Torque converters
Power shuttles
Transmissions
And more
A/C compressors
Electronic controllers
Monitors
Coolant is important in your equipment’s cooling systems to prevent freezing, corrosion, cavitation and rust.
A periodic coolant analysis can provide important information about the health of your machine.
What’s in coolant?
- Nearly all heavy-duty antifreeze is about 95% ethylene glycol and 5% water and additives. About 1% of all antifreeze sold is made from propylene glycol, an alternative to ethylene glycol which is less toxic, but more expensive. By mixing glycol with various ratios of water, coolant is created. Typically, coolant is 30 – 50% glycol.
- Formulations differ with the additive package that’s blended into the ethylene glycol. All of these additives fight rust, scale and corrosion but may have different chemical compositions. In diesel engines the additives also protect wet cylinder sleeves from cavitation.
What to look for when buying coolant
- Make sure the coolant you purchase for your diesel engines states that it complies with ASTM standard D-6210 on the package.
- Deionized water is preferred and the coolant should be prediluted, so there is no need to add water.
- Pick an antifreeze type, avoid mixing it with other types, and follow the maintenance recommendations suggested for that coolant.
Maintenance Recommendations
- Periodic visual test
Check color—should be clear, indicating no rust is present, and correct, showing that it has not mixed with another antifreeze type. - Test additive concentrations with a coolant analysis test by taking a sample and submitting it for analysis. The recommended interval for testing is 1,000 hours. McCann Industries has easy to use sample kits available.
- Sample strips are available to test additive concentrations yourself. Using paper chemically sensitive test strips, you can see problems from color changes which indicate freeze/boil point (glycol content), nitrite (or nitrite/molybdate) levels and, in some instances, pH.
OAT Coolant
- OAT coolant is required for new Case Tier 4 Final engines with ≥ 56 kW emissions.
- Use OAT coolant to avoid the risk of serious engine damage through overheating.
Never Mix OAT with Regular Coolant
- Mixing coolants can cause gelling damage which is not covered by your warranty, and repairs can cost thousands of dollars.
Selecting Coolants
- Do not risk using OAT coolants from other manufacturers, unless they specifically meet CASE’s MAT3624 material requirements.
- Use the ATSM number, not the coolant color, for reference when selecting your coolant.
Mixing OAT with Water
- Mix half OAT and half water ratio, which will protect cooling systems to -35° F (-37° C).
- Only use de-ionized water with OAT coolant. Tap, hard, softened or sea water will reduce the coolant life and can cause deposits to form, creating hot spots and cavitational corrosion.
Avoid Machine Damage
- Do not use anti corrosive additives in an OAT cooling system. Although these additives are commonly used in ethylene glycol fluids, they can cause premature wear in your machine.
- Only use machines with chemical resistant hosing. OAT coolant will react with PVC, rubber and Viton seals, creating leaks over time.
Note: Use of OAT is not recommended for older machines.
If you choose to run OAT in an older application, the cooling system must be flushed. The nitrate level must not be higher than 20 ppm.
A few simple maintenance routines can extend the life of your skid steer tires dramatically.
Clean your Tires
Hose down your tires routinely so they are easy to inspect. Look for bubbles, bumps, cracks, and anything that might be lodged in the rubber.
Check the Tread
A quick visual inspection will also reveal any uneven wear. On skid steers, one set of tires may wear faster (the front or rear), depending on how they are operated. Rotate the tires as soon as you notice any uneven wear, which will extend the life of all four tires.
Operate with All Four Tires Engaged
There is less wear on the tires and the machine when the skid steer is operated with all four tires engaged on the ground. When the bucket is too far beneath a load, the front tires may lift slightly off the ground, placing stress on the back tires.
Keep the Tires on the Ground
Skid steer tires are designed for operation on ground, not on road surfaces. Consequently, the tires will wear out faster when they are driven on roads rather than on the ground.
Watch for Debris
Skid steers are operating in areas that are often full of debris. Drive carefully and avoid litter. Pneumatic tires can go flat, and foam-filled tires can leak if punctured.
Protect the Rims
Avoid popping off retaining rims, which can occur by catching the rim on an object. It’s inexpensive to replace a rim, but the downtime associated with unnecessary maintenance can be quite expensive. Look for tires with rim protectors built into the design.
Monitor the Pressure
With pneumatic tires, if the tire pressure is too low, you will waste fuel, and if it’s too high, you increase the chance of flats. In either case, uneven wear can result. Keep a reliable tire gauge handy and check the pressure every day or once a week, depending on how often you are operating the skid steer. Check your owner’s manual for the acceptable tire pressure range.
Store Properly
Constant exposure to sunlight can cause tires to expand and crack. Store tires in a cool, dry place.
Buy Consistent Brands
Avoid installing different brands or models of tires on the same machine. Each brand has its own distinct design and combining brands can cause uneven wear on both your tires and your skid steer.
Clean Fuel Extends Engine Life
Dirt and dust in your fuel system can reduce engine life by 50%. These contaminants cause more than 85% of all failures in fuel systems.
Even tiny amounts of dirt and dust in your machine’s fuel system can become obstructions to the engine’s normal processes. Newer engines are even more susceptible to damage, because the fuel injection pressure is higher, and the smallest particles can impair normal engine functions.
Areas of Potential Damage
When dirt and dust are introduced to an area in the engine where quick, sliding movements are important, wear can be accelerated when these small particles interfere with the sliding movement. Examples of these parts are inner and outer valves, nozzle needles and seats, and command piston sliding portions. Two areas where dirt and dust can cause particularly harmful damage are at the interface between the injector barrel and plunger and on the control valves.
Interface between Injector Barrel and Plunger
The amount of fluid required to keep the operation smooth and continuous between the injector barrel and plunger is just 2.5 microns. The introduction of dirt or dust into this area could cause significant interference with this movement.
Control Valves
A decrease in engine power occurs when the control valves, which maintain fuel pressure, begin leaking. Such leaks are caused when contaminants wear away seals.
How to stop dirt and dust from entering the fuel line
Fueling
Properly maintain all fueling equipment. When you refuel, always replace the nozzle back onto the pump, rather than letting it fall on the ground where it could gather dust.
Operation
Construction equipment often operates in a dusty environment. You can prevent dust from entering the fuel system by making sure the vent tube and fuel tank caps are tightly sealed.
Service
While servicing your equipment, minimize the possibility of exposing the engine to the air, which will minimize the risk of introducing dirt and dust into the fuel system. Whenever you change filters, refuel or make any type of engine repairs, accomplish these tasks indoors, if possible, where there is less chance of contamination.
Filters
Change filters promptly at the manufacturer’s suggested intervals—clogged filters cannot prevent dirt from circulating through your engine. Use filters that are approved by the equipment manufacturer. Carefully follow the instructions provided in your equipment operator’s manual when changing both the main filters and the prefuel filters, so that dust does not enter the fuel system during this process. Always check seals to detect possible leaks.
Tips for Changing Filters
Main Filter
Do not fill the filter element with fuel when changing the main filter to avoid introducing dust during the replacement process. Also, check to insure that the o-ring fits properly. Operate the priming pump to fill the new filter with fuel.
Prefuel Filter
Fill the new filter cartridge for the prefuel filter with fuel before installing it. Check to make sure the cap is attached to the new filter cartridge, then pour fuel into the cartridge (do not use the center hole). Once the cartridge is full of fuel, take off the cap and discard it. Install the prefuel filter cartridge onto the filter holder after applying a thin layer of engine oil to the packing surface of the cartridge. When the packing surface on the cartridge comes in contact with the sealing surface of the filter holder, tighten the filter cartridge to turn.
How to prevent water from entering the fuel line
At night, condensation can occur due to a drop in the temperature while the equipment is not operating, and water may enter the fuel tank. To avoid the formation of condensation, at the end of each day, the tank should be filled up. Before beginning to operate your equipment each day, drain the water and sediment that has accumulated at the bottom of the tank. Similarly, about ten minutes after refueling, water and sediment should be drained from the fuel tank.
Use the best fuel.
Make sure you are using high quality winter diesel fuel. The fuel conditioner should match the type of fuel you are using (e.g., low sulfur) and should be approved by manufacturer.
Check starting devices
Check to make sure block heaters and cold weather starting devices are working properly.
Warm up the machine
Let machines come up to operating temperature before working.
Keep a spare fuel filter
Keep an extra fuel filter in the cab, but follow installation instructions in your operator’s manual.
Check ice build up
Check for Ice or snow build up in exhaust or intake if applicable. Inspect and clear Ice or snow build up from throttle, and brake area.
Warm up to improve steering response
Steering response on equipment with hydraulic steering may become very slow at low temperatures, even when the correct oils are used. Once the engine is started, let the machine idle until the engine reaches operating temperature.
Safety first
Mount and dismount your machine using three points of contact. Remember that you are working with snow and ice; slips and falls are a common cause of injuries. Wear your seatbelt when operating equipment and stay alert.
For Idle Machines
- Start once a month, when temperature is above freezing.
- Avoid starting a machine in extreme cold weather.
- Operate hydraulics for a brief time.
- Do not try to break crawler type machines from a badly frozen situation. It can result in power train damage.
- Test batteries, and use proper procedures if a unit needs to be started with an assist devise or jumper cables.
Follow these best practices to make sure your machine is ready for winter.
- Check chain tanks, final drives, swing gear baths and gear boxes for water. Check the label to make sure you’re using coolant that complies with ASTM standard D-621, with a freeze point low enough for your climate. If coolant freezes, it can crack the engine block and ruin the engine.
- Add fuel conditioner.
Fuel conditioner prevents your fuel from freezing and makes sure your engine starts in the cold. Check the manufacturer’s recommendations for the amount of conditioner required. Match the fuel conditioner to the type of fuel you’re using (e.g., low sulfur). - Check the fuel filter.
If the fuel filter is clogged, moisture can build up and freeze in the winter, causing your machine to run improperly or fail to start. Empty the water traps in the filters before cold weather arrives. To avoid downtime, keep an extra set of fuel filters in your cab. - Check cold start aids. Diesel engines spray ether into the air system to help the engine start in cold weather. For older machines that have ether spray bottles, check the bottle to make sure it isn’t empty. For new machines with an automatic ether system, inspect the connections and hoses for cracks or loose connections.
- Check the block heater.
Block heaters keep fluids at the right temperature and viscosity. If it isn’t working, the oil can thicken, so it’s harder to turn the engine over and adds stress on the battery. Plug in the block heater to check it, then touch the hoses to make sure they are warm. - Inspect air pre-cleaners.
Large dust particles and debris can build up during the summer and should be removed. Otherwise, snow and ice could collect around them, allowing moisture into the air system, which could cause engine failure. - Check battery and connections.
Corrosion around battery connections causes less voltage to be transmitted, and increases the strain on the battery. Corroded connections can drain the battery, preventing your machine from starting. Periodic inspections for corrosion reduce the chance of having a drained battery.
Winter Storage
- Top off the fuel tank if possible.
If you have a diesel engine, leave it completely full during winter months to eliminate the possibility of condensation forming in the fuel tank and spreading. Condensation can clog the fuel filter, which can clog fuel lines, carburetors, and injectors. - Run the engine after cleaning.
Run your machine’s engine after cleaning the engine and replacing the oil so that a protective film of oil coats the internal parts. The oil coating acts as a rust preventative. Pour a 50/50 mixture of water and antifreeze into the coolant system before running as well to protect the cooling system to -34°F. - Clean & fully charge batteries, then disconnect the power leads.
Never store discharged batteries. Colder temperatures slow the discharge rate of fully charged batteries. - Start machines once a month.
Avoid starting the machines in extreme cold weather. Find a time when temperature is above freezing to start the machine and operate the hydraulics for a brief time. - Do not try to break crawler type machines from a badly frozen situation. The result can be power train damage.
Cold Weather Operation
- Protect your machine.
If you can’t keep your machine inside when it’s not in use, at least keep a weather resistant tarp over the engine. With snow comes condensation, which can cause problems for the entire engine. - Manage productivity.
Cold weather makes the earth harder, and frost can penetrate roadways and aggregates to make utility, road, and crushing jobs much more difficult and time consuming. Winter months have less daylight, so manage your time wisely. - Keep the job site clean.
It is imperative to keep jobsites neat and clean during winter months. When not working, leave a layer of snow on the ground to keep frost from penetrating the ground – the snow will actually insulate the ground beneath. When working, make sure to clear all snow and ice to avoid accidents. - Clean areas designated for snow removal.
Clean up debris or equipment that will be hidden by fallen snow. Mark any areas of concern with reflective stakes so snow removal crews can easily identify & stay away from those areas. - Plan for earthworks projects.
Frozen chunks of ground need to be placed in designated areas. The frozen chunks of earth contain water that can cause major problems in the spring, such as sink holes. - Use the best fuel.
Make sure you are using high quality winter diesel fuel. The fuel conditioner should match the type of fuel you are using (e.g., low sulfur) and should be approved by manufacturer. - Check starting devices.
Make sure block heaters and cold weather starting devices are working properly. - Warm up the machine.
Let machines come up to operating temperature before working. - Keep a spare fuel filter.
Keep an extra fuel filter in the cab, and follow installation instructions in your operator’s manual. - Check ice build up.
Check for Ice or snow build up in exhaust or intake if applicable. Inspect and clear ice or snow from throttle and brake area. - Warm up to improve steering response.
Steering response on equipment with hydraulic steering may become very slow at low temperatures, even when the correct oils are used. Once the engine is started, let the machine idle until the engine reaches operating temperature. - Stay aware of safety.
Mount and dismount your machine using three points of contact. Remember that you are working with snow and ice slips and falls are a common cause of injuries. Wear your seatbelt when operating equipment and stay alert.
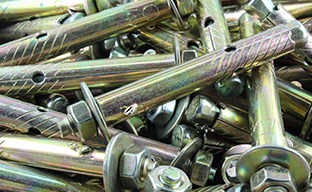
Adjusting Tension
Improper tension
Loose tracks can detrack. Over-tightening can cause power loss, excessive roller and idler wear, and could tear the tracks. Refer to your operator’s manual for track inspection and tensioning procedures.
How to adjust
Track tension is controlled by a track adjuster located behind the front idler. Tension adjustments are made by pumping or draining grease through the track adjuster valve. Even small adjustments in track sag have a big impact on tension. A change in sag from 1’’ to 0.5’’ increases tension by about 3,000 pounds. Refer to your operator’s manual for specific information on how to adjust the track tension of your machine.
Inspect adjuster valve periodically
Make sure your adjuster valve is working properly by visually inspecting it periodically. If the valve shows signs of leakage, bring your machine in for repair as soon as possible. Leakage can lead to a loss of track tension and increased wear.
Match Tension to Operating conditions
Adjust track tension on-site
Make tension adjustments on the job site rather than in the shop. Track tension may increase if the sprocket and chain are packed with mud or other materials. A track that is properly tensioned in the shop may become too tight when packed with mud.
Test packing conditions before adjusting
To match track tension with the specific packing conditions of the job site, run your machine for a short while on the job site, then make the necessary adjustments.
Make frequent adjustments
Changes in weather can alter the packing conditions of the job site throughout the day. Making tension adjustments in response to these changes can help reduce track wear and costs.
Do not operate your machine if the tracks are frozen
Wait for the weather to improve if your tracks become frozen. If you try to use power to force the tracks to move you might destroy them.
Operation
Avoid abrupt turns and high speeds
Do not make abrupt turns, because they place unnecessary stress on the track and undercarriage. Continuous turning to the same side can cause asymmetrical wear. Higher speeds cause more wear on the undercarriage. Use the slowest possible operating speed for the job.
Avoid excessive reverse operation
Do not operate in reverse unless necessary. Reverse operation wears tracks up to three times as quickly as forward operation. Highspeed reverse is particularly destructive to tracks and undercarriage components.
Inspection
Have your undercarriage inspected annually by a trained technician to catch problems early before they lead to unnecessary damage.
Quick couplers are used on most job sites. Using quick couplers safely and responsibly can reduce risk of injury and damage on the job. Follow the below tips to make sure you are taking proper precautions when using quick couplers for your attachments.
Take Precautions
Train your operators
To prevent accidents related to quick coupler systems, thoroughly train operators in their use. All operators and supervisors should receive training on making visual inspections, the procedures for engaging attachments, and methods of evaluating and testing connections.
Install cautionary labels
Most excavator and quick coupler manufacturers provide warning labels reminding operators not to use the coupler without a safety pin. Warning labels should be placed in the cab where the operator can clearly see them as well as on the dipper arm. The condition of the labels should be inspected daily, and the labels should be replaced if they become damaged or illegible.
Only use approved attachments
Do not use attachments that exceed the limits outlined by the excavator and coupler manufacturers. Not all manufacturers approve the use of breakers or other attachments. Always consult the coupler manufacturer when uncertain about attachment use.
Upgrade your equipment
Newer quick coupler models are specifically designed to prevent unexpected release of attachments. If you are using an older model quick coupler, upgrading to a new system may help prevent accidents. Alternatively, you can install retrofits.
Maintain Your Couplers
Inspect quick couplers regularly
Visually inspect quick couplers before each use to ensure that they are not subject to hazards associated with accidental release. Quick couplers should be inspected before each use to ensure that the safety pin is in the correct position. With many coupler systems the operator will need to manually inspect the safety pin. With fully automated systems the operator may be able to visually verify that the safety pin is in position from the cab.
Regularly maintain your couplers
Maintenance is essential to safe operation of quick couplers. Regular maintenance can prevent deterioration and wear of quick couplers. Manufacturer’s preventative maintenance should be strictly observed to ensure safety.
Practice Safe Operation
Exercise caution when changing buckets
High-risk activities, such as bucket changing and attachment testing, should be designated to clearly defined areas. The operator must ensure that the safety pin is in place before lifting the quick coupler. Once the bucket is attached, secured, and checked, the quick coupler should be shaken vigorously to ensure a secure connection with the coupler.
Removing the quick coupler safely
Do not remove the quick coupler from the dipper while a bucket or attachment is still connected, as this can damage the coupler and the attachment. For safe removal, lower the coupler onto a structure at level height. Release all hydraulic pressure from the circuit and make sure that the machine is off before removing. To prevent contamination, immediately plug the quick coupler hoses and pipe work of the machine after disconnecting. After disconnecting the coupler, remove all dirt and debris from the operating mechanism before placing in storage.
Underinflated tires are a drain on your business. Low tire pressure increases fuel usage and wear. Follow these best practices to get optimal performance from your equipment.
Check tire pressure regularly
You can’t check tire pressure with a visual inspection. Many tires will look properly inflated even if they’re not, which is why it’s important to check regularly with temperature changes. In the winter, check tire pressure weekly. The best time to ensure an accurate reading is before you operate the machine or three hours after shutting down. A general rule of thumb is that 10° F air temperature change correlates to a tire pressure change of 1 psi.
Measure tire pressure at the working temperature
Don’t measure tires in a warm shop if you’ll be working in the cold. Make sure you’re taking accurate tire pressure readings in the setting that the equipment will be used.
Inflate tires with nitrogen
To combat pressure fluctuations, consider using nitrogen to fill your tires. There’s no added risk of combustion or fire and it prevents ice crystals from forming that could hold open the tire’s valve stem. When inflating your tires with Nitrogen, continue to fill the tire to the manufacturer’s recommended psi.
Slowly roll tires if they have been sitting for long periods in cold weather
When first using a machine after it has been parked, gradually move the machine at first. Cold temperatures can cause the contact surface of tires to go flat against the ground and this will allow the tires to return to their correct shape.
As temperatures warm, continue to keep an eye on tire pressure
Don’t let your tires over inflate as temperatures increase. Faster, irregular wear can occur, shortening the tire’s life. Measuring tire pressure regularly throughout any temperature fluctuation ensures you’ll be working at optimal pressure.
The versatility of skid steer and compact track loaders makes them a staple on almost any jobsite. Follow our best practices to make sure you are getting the most out of your equipment by completing work efficiently and safely.
Always wear your seatbelt
Rollover accidents are a leading cause of injury and death in CTLs and skid steers, often because the operator wasn’t wearing a seatbelt. Even if your equipment features a ROPS system, seatbelts are an important component to assure safe operation. No matter how light the load or how short the distance, fasten your seatbelt before you begin operation.
Don’t travel across slopes
If you need to go up or down a slope in your machine, make sure the heaviest end is positioned uphill and travel in a straight line up and down. This position maximizes stability and greatly decreases the risk of rollovers. When no load is being carried, the rear of the machine is usually heavier.
Never leave the operator’s station while the engine is running or when the arms are raised
Another leading cause of injury or death involving skid steers and CTLs is hitting or crushing someone with moving parts. Buckets can unexpectedly lower or loads can be dropped without notice. Never start the machine or make adjustments from outside the cab, and never allow someone walk under raised arms.
The proper technique for stopping the machine is:
- Lower the arms and attachment flat on the ground
- Stop the engine and remove the key, or lock the keyless panel
- Engage the parking break
- Move the controls until they are locked or in a neutral position
Never transport personnel in the bucket or on attachments
No more than one person should ever be involved in operating a skid steer or CTL. Falling off these machines can result in serious injury or death. Never lift the hydraulics or drive a machine with another person riding along the outside of the machine.
Keep Costs Down by Extending the Life of Your Attachments
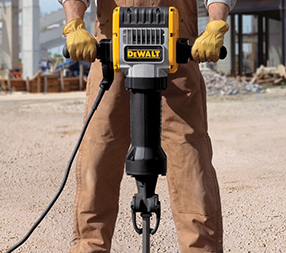
Hydraulic Hammers
Complete a Regular Three Part Inspection
- Check for leaks in the attachment’s fittings or hoses
Prior to use, inspect hoses for cracks and check that shielding is in place. Make sure your fittings are not loose and your hoses and fittings are free of contaminants. - Inspect critical points for proper lubrication and function
Power wash the attachment to remove dirt, sand or other contaminants. Once clean, follow the manufacturer’s guidelines for proper special grease or oil lubricant requirements for proper bushing wear. These contain special agents designed specifically for manufacturers’ units, and standard grease is not acceptable for most hammers. - Make sure the locking mechanism is operating correctly
The locking mechanism should not be stiff or bent to ensure proper locking and unlocking of the attachment. Check for damage whenever attachments are changed. Never pry with tool while operating.
Best Practices
- Keep hydraulic hose ends out of the dirt
- Make sure your hammer’s in and out ports are closed on the jobsite – dust and sand can easily enter if left open
- On a weekly basis, or every 10 hours, remove and inspect the retaining pin and tool
- On a monthly basis, or every 50 hours, inspect the tool shank and bushings, carefully checking for wear
- Every 50 hours, inspect hydraulic hoses
- Hammers should be serviced annually or every 600 hours
Buckets & Teeth
Bucket Inspections
Buckets require extra care – a well maintained bucket can cut down on costs by digging and breaking out more efficiently, which reduces fuel consumption and increases the rate of job completion. Prior to use, carefully check the following parts of your bucket:
- Mounting Hinges
Inspect for cracks. A small crack can quickly become much larger – if you see any cracks, get them fixed immediately. - Front Leading Edges and Corners
Visually check to see if they are getting thinner or if there are signs of cracking. If so, the corners can be re-plated and thickened to increase the life of the bucket. If left unchecked, the corner could fail during heavy digging and the bucket edge can be torn out completely and would have to be replaced. - Bucket Edges
Any signs of distress? If so, can it still be serviced? If you are working with a bucket with reversible edges, you may want to consider rotating them. - Bucket Teeth
Check if they are worn or need rotating. Teeth that are regularly rotated last longer, saving you money. Corner teeth tend to wear faster – move them to the center to increase their life. Many styles of teeth can be turned upside down – the lower edge wears faster and if they are turned over they will wear more evenly. - Lost Teeth?
Do not use a bucket with a missing tooth. Not using a full set of teeth will wear away the adapter nose and result in poor contact when new teeth are installed. - Correct Bucket Teeth?
There are a wide range of bucket teeth that can be used for a variety of applications – make sure you have the correct teeth for the job, such as penetration teeth for rock or abrasive teeth for coal. - Lubrication
Is the bucket properly greased? Insert some lubrication into the proper bucket pin locations. Simple lubrication is the cheapest and best form of maintenance. Also, - Check pins and bushings for wear at this time
Worn pins & bushings cause more stress on the machine, and rapidly lead to expensive and more in depth repairs when let go too long. Also, worn pins & bushings result in less control of the machine during operation.
Schedule maintenance inspections
Typical inspection includes
- Operational test
- Lube chassis
- Drain water and sediment
- Check fluid levels and adjust
- Change engine oil and filter
- Check and adjust chains
- Clean front and rear axle breathers
- Change fuel filters
- Engine oil analysis
- Change hydraulic filters
- Change inline fuel filter
- Check fan belt tension
- Lubricate attachment coupler
- Grease slides and post
- Clean battery/check levels
- Clean spark arresting muffler
- Repack front wheel bearings
Note: Our inspections follow manufacturer’s guidelines specific to each model
Check wear parts inventory
With parts on-hand
- Filters
- Hoses
- Belts
- Tires
- Blade edges
- Bucket teeth
- Hydraulic fluid
- Oil
- Batteries
Parts lockers available with automatic restocking
Arrange service workshops
Our staff will teach yours best practices
- Engine maintenance
- Undercarriage maintenance
- Attachments—Use, safety and maintenance
- Parts options—New, used and remanufactured
Daily Checks
One of the simplest—yet often overlooked—maintenance practices is the daily walkaround checklist. Be sure to check the engine oil, hydraulic fluid and coolant and top off when necessary. Make sure that you’re using the manufacturer-recommended fluid. Remember, it never hurts to ask your dealer or your tech. After a week or so, it is important to check the fuel filter and drain any water or debris that may have built up, or replace it if necessary. Next, check the hydraulic hoses and air system for leaks—its always better to find a problem and fix it while it’s small, than to wait until it’s too late.
Get out the Grease Gun
Next, check all pivot points on the machine and grease where needed. You should also check the track tension—always check your operator’s manual for the proper technique. Something that is often completely overlooked is the bucket or attachment. Be sure to check all the pivot points on the attachment as well, and grease where needed. Also, take a look at the teeth on the bucket. If they are worn down to a certain degree, that can have a serious effect on the machine’s performance. If the teeth are worn and dull, the machine has to work a lot harder to get the job done, and there’s no reason for the added wear-and-tear on the machine. If you aren’t sure, ask your dealer or tech.
Cooling System
It is important to keep the radiator, oil cooler and other heat exchangers clean during operation. Check for any accumulated debris, and wipe down when necessary. Remember, slow oil or coolant leaks tend to collect dust and other particulate matter—keep an eye out for potential problem areas during your daily checks.
Special Maintenance Features
Many modern excavators offer special features that allow for easier maintenance. Easy access is crucial when it comes to quick maintenance checks—all of our excavators feature a well-designed engine compartment and access panels. You should be able to access and locate components easily and safely. Another great feature on our newer excavators is a multi-function monitor in the cab. This electronic panel offers important performance readouts, and will let an operator know when fluid levels are low, or when maintenance is required.
Check the Manual
You probably hear this a lot, but it is really important to use OEM filters and manufacturer-recommended fluids and fuel. The machines where developed and tested using these fluids and filters, and any difference in specs can affect the performance of the machine.
Be sure to check your operator’s manual and make sure that you are keeping up with the regular service intervals. Your technician will be sure to check the belt tension and alignment, keep up with the proper oil and fluid changes, and keep the cooling system running properly. Ask your dealer or tech about regular service intervals—again, it’s always better to stay on top of things
Choose the right hose
When choosing a hydraulic hose you should pay close attention to the following characteristics:
- Working Pressure – Choose a hose that is suitable for the working pressure of the machine
- Wire or Sheathing – Install wire or sheathing when fabricated if the hose will be used in an area exposed to damage from pinching or crushing
- Fluid – Make sure you use a hose compatible with the fluids that are used in the machine
- Size/Inner Diameter – Choosing the right size hose is important in order to avoid unwanted friction. When fluid rubs against the inner surface of the hose, friction is created, which creates heat, increases back pressure and reduces the rate of flow
- Match the Fluid Viscosity to the Operating Temperature – In order to achieve maximum component life, the fluid’s viscosity grade should be correctly matched to the operating temperature range of the hydraulic system
Keep your hose operating correctly
Follow these maintenance tips to ensure optimal performance and reduce risks, labor costs, and downtime
Pre-Use Inspection – To be completed before each use
- Check hydraulic hoses for signs of deterioration – Look for indications of wear, such as cracking, blisters and bubbles. Catching signals early helps avoid hose failures later on
- Inspect seals used in fittings and adapters – Seals wear down, harden and age with regular use. Check for signs of wear and replace as needed
- Timeframe for replacement varies – There is no set time to replace hydraulic hoses. Rate of deterioration depends on a variety of factors including usage, pressure, and the type of hydraulic liquid
- Semi-Annual Maintenance Checks – At a minimum, hydraulic hoses should be thoroughly inspected by a certified technician every six months
Storage and Safety Tips
- Keep fittings clean – Avoid getting sand, dirt or other substances on your fittings and clean before each connection
- Use caps and plugs when not in use – Use of caps or plugs on your hydraulic hoses keeps them clean and saves time later when you have to re-attach them
- Store in the shade – Keep hoses stored out of direct sunlight. The sun accelerates deterioration and high pressures can result when the oil expands in the hose, making connection more difficult
- Detach carefully – A pressure relief tool is the best implement to remove a pressure-locked hose. Do not hit hoses on the floor to release pressure
- Always wear safety goggles when working with hydraulic hoses
What if a hose fails?
Usually hoses fail due to misapplication, deterioration or improper maintenance. If the hose fails, be extremely careful:
- Shut down the machine immediately to avoid additional damage
- Allow machine to release pressure – Pressure is not released immediately and machines need time to release pressure to a level suitable for a proper inspection
- Do not search for the leak using your hands – Hydraulic fluids can penetrate the skin and pose a significant risk to your health
- Carefully replace the hose and test for proper operation
When using heavy machinery, certain practices can help reduce overall fuel consumption and costs. The following tips may help you save hundreds of dollars each year.
Inspect air filters regularly
Inspect your air filters every 50 hours to ensure maximum operating performance. If the pleats of your filter are clogged with dirt, it is time to change the filter. We do not recommend cleaning the air filter, which can damage it.
Changing your air filters regularly is the most simple and cost effective way to decrease fuel costs. When an air filter becomes clogged with dirt, the engine cannot get the air it needs and does not operate efficiently. Some machines have air flow indicators that tell you when it is time to change the filter. If you wait until you see a warning, however, you have probably been wasting fuel.
Grease fittings properly
Lubricate your machine according to manufacturers recommendations. By keeping your machine properly lubricated, fuel efficiency is increased simply because the power needed to perform operations is reduced. The more mobility the components have, the less work the hydraulic system must perform.
Check tire pressure
Check tire air pressure before and after each use. If the tire pressure is low, fill the tires as soon as possible. Low air pressure can reduce the efficiency of your machine and lower fuel efficiency. Checking tire air pressure is easy and costs nothing.
Be alert for signs of a mechanical problem
When you see signs of a mechanical problem, such as excessive black smoke, bring your machine in for repair before the problem gets worse. Mechanical problems, such as a bad fuel injector, can significantly reduce fue efficiency. If your fuel injector is overfueling a cylinder, your machine is wasting fuel.
Run your engine at low RPM when possible
Begin by running at a low rpm during operation, then slowly raise the rpm until the engine does not strain. This level will be the most efficient and effective rpm for the job. When a job does not require maximum power, running the engine at a lower rpm can significantly reduce fuel consumption.
Service your equipment regularly
Follow the manufacturer’s guidelines for servicing your equipment. Most require service at least every 500 hours. Fuel efficiency is affected by many different components. The best way to ensure that your machine is working efficiently is to service it regularly.
During the winter months, it’s important to stay warm when working outdoors in cold temperatures to retain body heat and avoid hypothermia and frostbite. The following best practices will help you and your team operating in the winter.
Prepare your equipment
Air Filters
Check, and if necessary replace, air filters in the cab to improve your heater’s effectiveness. Also, make sure that snow or ice isn’t blocking any airways.
Radiator
Cover the radiator intake to help the machine warm up faster. Don’t operate the machine until the engine has reached operating temperature to reduce the chance of damage.
Engine Block
Plug in engine block heaters at night for each machine to avoid problems and service calls.
Wear the proper gear
Coveralls
Thermal insulated coveralls are essential for anyone who is working outdoors in the winter. They are designed to maximize body heat containment while allowing a wide range of motion. If coveralls aren’t an option, look for thermal long underwear to help keep in body heat.
Helmet Liners
Worn under a hard hat, these liners keep your head and neck warm. Fleece lined fabric is the most popular choice because of its comfort and insulation levels. Keep spares on hand and remember to wash them regularly for the best results. Maintain a stable center of gravity at all times.
Proper Gloves
Glove selection is crucial to balancing warmth with dexterity. Make sure the fabric and textures are suited to your job and consider gloves that work with a liner. They may be a little oversized, but they allow increased protection.
Thermal Socks and Insulated Boots
Standing or walking on cold surfaces for long periods of time can quickly decrease your core body temperature. Double layer socks and boots designed for cold weather can make a big difference.
Optimize the environment
Ground Barriers
Where possible, stand on mats, plywood or other barriers if you’ll be working outside for long periods of time. These materials act as installation to help decrease the amount of body heat lost to the cold ground.
Portable Heaters
There are many types and sizes of heaters that help keep workers warm. Rent or purchase heaters for outdoor projects to increase worker productivity.
Watch for these symptoms
Keep an eye out for the following symptoms of over exposure.
Hypothermia
- The body stops shivering
- Breath becomes shallow and slow
- Victim will suffer from memory loss and confusion as well as exhaustion
- Speech may become mumbled and slurred
- Extremities will loose coordination causing stumbling and fumbling
- Pulse will slow down and become weak
- In severe cases unconsciousness can follow without breathing or a pulse
Frost Bite
Initial signs of frostbitten skin include
- A change in color to white, grey-yellow, or dark and black
- A texture that is hard and waxy feeling
- Numbness
- Blisters
During rewarming and healing the skin may
- Swell and become painful
- Burn and itch
Skin damaged by frostbite can suffer from long-term numbness. In some cases, the tissue dies requiring removal of the body part.
Never open or inspect the radiator while the engine is running or the system is hot
Personal injury can result from hot, pressurized coolant. Always shut off the engine and allow the radiator to cool before examining the system or beginning any work.
Keep coolant fresh
It’s estimated that 40%-60% of engine failures are coolant related. These failures either are related to using an improper coolant or to topping off the system with the wrong product. Keep careful records to make sure you’re changing the fluid at factory recommended intervals and not mixing coolants.
Remove blockages daily
Check your radiator screen daily during warm weather for dirt, grass or other debris. A clear screen will help your machine stay cool and assure maximized performance.
Clean radiator cores
Use compressed air to blow debris from the cores. If material remains, you can use high pressure water or steam to remove dust and debris, but compressed air is preferred.
Inspect the radiator cap for damage
When the radiator is cool, slowly remove the radiator cap to reduce system pressure. Inspect the cap for damage or deposits of material. If any cracks or damage are visible, install a new cap. Otherwise, clean and close the cap firmly.
Be especially vigilant when using hydraulic attachments
Hydraulic attachments put more stress on a machine’s cooling system than using a bucket. This stress leads to faster overheating and requires the operator to keep a close watch of the machine, especially in hot weather.
Properly sanitizing heavy equipment is essential for maintaining the health, safety, and productivity of your team. Truck and machine cabs can be ideal environments for harboring and transmitting viruses and other illnesses. Despite the fact that operators are typically alone in the cab, all it takes is one mechanic, supervisor, or second shift operator to hop in there, touch a surface, and potentially be infected or leave traces of a virus.
Since the COVID-19 pandemic, many companies have a heightened sense of awareness when it comes to maintaining cleanliness. Follow these heavy equipment sanitation tips to protect your team from coronaviruses, the flu, and any other pathogens that may strike.
Find the right disinfectant
Before you start actually sanitizing your construction machines, you have to find a disinfectant that is effective at eliminating the majority of viruses without damaging your equipment interior. To avoid harming or discoloring vinyl, plastics, leather, or other surface materials, we recommend using cleaners designed for automotive interiors, not general household.
Isopropyl based cleaning products can be used to sanitize the majority of hard and interior surfaces. When using an alcohol based cleaning solution, the CDC recommends concentrations of 70% or above. Follow the instructions on the product for concentration, application method, and contact time. If you are trying to deactivate or kill a specific virus, check the EPA-approved disinfectant list for detailed descriptions of which types of cleaners to use for certain pathogens.
You should consult your owner’s manual for directions on how to clean monitors, touch screens and other sensitive surfaces without damaging them.
Wear personal protective equipment (PPE)
Once you have the proper cleaning solution, it’s time to move into the cab. The person handling the sanitation should always wear latex or synthetic rubber gloves and a mask or face covering. Wearing personal protective equipment will ensure the team member is shielded from the cleaning chemicals, as well as prevent them from leaving traces of a virus on the surfaces they just wiped down.
Clean all interior surfaces likely to be touched
The most important parts of the cab to sanitize are the ones that we touch a lot. Those areas should be cleaned before each new person enters the machine and typically include all handles, joysticks, steering wheels, knobs, buttons, seat belts, seat belt latches, windows, and even floor mats. Spray surfaces with the cleaner and use a highly absorbent microfiber cloth to scrub and wipe dry. For sensitive electronic or display areas, use an EPA approved contactless product, which you can spray and let dry without needing to wipe off.
Other surfaces to pay attention to
Just as important as sanitizing interior hard surfaces are exterior surfaces. Spray, scrub, and wipe all machine touchpoints, including the dipstick, gas cap, engine access points, handles, latches, and anywhere else likely to have contact.
Although it typically does not have to be sanitized as often as hard surfaces, it’s a good idea to clean your upholstery at least every week, if not more frequent. You will find a variety of upholstery products at any auto parts store. If applying your own solution, avoid using anything that contains bleach, as it will cause discoloring.
Wash surfaces before sanitizing
Before using your sanitizing solution to disinfect equipment, ensure all dirt and dust are washed off. Washing before disinfecting is especially important for your machine’s exterior, but also for floor mats, handles, and anywhere else that is visibly dirty. Clearing dust and debris will make the sanitation process more effective.
Renting heavy equipment has become a popular alternative to buying. Not only does it help you keep costs lower, it also means you are not financially tied to a narrow inventory of machines. Renting from McCann allows companies to take on a variety of different types of jobs, all while staying within their budgets.
Keep your costs under control
Purchasing new heavy equipment can be extremely expensive and can cut severely into your company’s budget. And the costs don’t end the day you receive the keys your new machine. In fact, after you actually buy the new equipment is when the real costs begin.
In addition to the ticket price of the heavy equipment, once you own the machine you are responsible for the upkeep. That means routine maintenance, major repairs, and even expenses you may not have thought of, like winter storage. Not only does this type of upkeep cost you money, it also costs you time. You can’t use your machines while they are being repaired so you will have to either wait to complete the job or spend money on a rental anyway.
By choosing to go with heavy equipment rental from McCann from the start, instead of buying all brand new machines, you have the benefit of avoiding both upfront purchasing costs and maintenance and storage costs down the road. Not to mention the fact that if your rental machine goes down, there’ll be another one ready for you to use to keep downtime at a minimum.
Don’t Be Tied to the Machines You Own
Purchasing new heavy equipment ties down your company’s financial resources and effectively limits your ability to take on specific jobs. Certain machines perform certain tasks, and by buying those machines, you now are stuck performing only the tasks that they are able to. This means that if a job comes along that is beyond the ability of the equipment you already own, you will most likely have to turn it down.
Having to turn down jobs because you don’t have the right equipment is never a solid business strategy. And buying a machine to meet the requirements of one job or one contract is an even worse strategy. To purchase every machine and every attachment each time a job requirement comes up will probably bankrupt your company.
On the other hand, at McCann, we rarely if ever have any shortage of specialized equipment or attachments. You can always rent the tools you need to perform such tasks as ground preparation, erosion control, material recycling, demolition, and other tasks that you may not own the right machines or equipment for. Heavy equipment rental, in effect, allows you to be more flexible and to keep your options open, having the right type of equipment for the job, every time.
Renting equipment keeps you working with the newest and best
Whether it’s cars, computers, cell phones, or heavy construction equipment, modern technology is constantly changing and evolving. That means that as soon as you sink your resources into one machine a better one has probably already come along. At McCann, all of our rental machines possess the most advanced features, latest technology, and most efficient engines. With renting, you never have to worry about your construction machines becoming obsolete.
Try before you buy
Heavy equipment rental gives you the opportunity to try new construction machines before you make a massive investment. By renting first, your operators can weigh in on the pros and cons of any specific model or features before you take the next step of ownership.
Want to learn more about how our rental equipment can help? Call our rental experts today
Renting construction equipment should be straightforward and hassle free. By being prepared and knowing the equipment dealer’s requirements, you can speed up the rental process and be back to work in no time.
Credit Approval and Payment
Credit approval is often required when renting construction equipment. At a minimum, most dealers will either collect the rental payment in advance, or require you to set up an account. Before deciding what equipment to rent, be sure to have an acceptable payment method ready. If you’re not sure whether you have the credit necessary to receive approval, contact the rental department to see what other options are available.
Rental Equipment Delivery
In most cases, you will have to pay for delivery, so make sure you make arrangements to pick up the construction equipment that you are renting, if you can. Otherwise, provide the location and agree on a time for the equipment to arrive. Remember to take the delivery schedule into account when planning your job.
Rental Equipment Insurance
Insurance is usually required for rentals, so contact your insurance provider before going to the dealer to see what steps you need to take. If you don’t have an insurance provider, contact the dealer and see if they can recommend anyone.
Contract for Rental Equipment
Review the rental contract carefully before you sign it. This document will contain important information on your responsibilities while the equipment is under your control. It may also contain any hidden fees that might not be apparent, such as cleaning, repairs and maintenance fees. If you have questions about any of the information in the rental agreement, be sure to ask before you sign it.
Damage Responsibility for Rental Equipment
Take care of the construction equipment you rent, as though it’s your own. You aren’t typically charged for damage due to problems with the machine or normal wear and tear, but abuse or negligence of the equipment can lead to additional fees. Excessive staining or cosmetic damage necessitating additional cleanup often incurs an additional charge. If the construction equipment is damaged while you are using it, be sure to document the damage and immediately notify your insurance carrier and the dealer.
Try before you buy
Renting is an easy, commitment free way to test drive a piece of construction equipment you aren’t sure about purchasing. It’s also a great way to see if a machine meets your requirements for power, productivity, and fuel efficiency.
If you intend to own a piece of construction equipment but lack the upfront capital to purchase it immediately, many dealers also offer rent-to-own options that provide a convenient way to expand your fleet on your schedule.
Rent and use on demand
Most dealers are flexible in their scheduling and have daily, weekly, or monthly rental rates, making it easy to avoid paying for construction equipment rentals during downtime or between projects. Jobsite delivery and pickup is usually available for added convenience.
Save on additional ownership costs
Renting is particularly helpful if you lack the resources to store and maintain large equipment, or you are looking to reduce overhead storage costs. The dealer is usually responsible for machine breakdowns, service, or repairs. If a unit stops working completely, most dealers will replace it altogether, saving you the hassle and downtime of bringing it into the shop.
Accommodate short term or specialized projects
If you need a specialized piece of construction equipment for a one-time or short-term job, renting is probably your best bet. Instead of buying a versatile machine that could handle many different types of jobs, renting allows you to use the specific type or size of equipment that would best fit the job.
Take advantage of the latest features
Technology is constantly advancing, and keeping up with the latest gadgets and features would be prohibitively expensive. Rather than replacing your construction equipment every time a new model is introduced, renting gives you access to the latest benefits without the long term financial commitment of owning.
Properly managing equipment is crucial to maintain your return on investment. A general guideline to follow is replace equipment once maintenances costs exceed 30% of the machine’s resale value. Below are strategies to help keep your fleet productive for as long as possible.
Proactive maintenance
Enroll equipment into preventive maintenance contracts to ensure routine maintenance is documented and conducted at suggested intervals. Proactive maintenance keeps operational costs stable and reduces downtime and associated repair expenses by identifying minor issues before they become major problems.
The 80-20 Rule
80% of maintenance costs are spent on 20% of machine problems. Identify common or repeat problems and take corrective action to resolve those issues that deplete the operating budget and cause unnecessary and costly downtime.
Use machine monitoring tools
New technology has developed tools that more accurately monitor equipment, collect data, and convert raw data into actionable information. Software is available to help fleet managers determine a machine’s resale value, calculate ownership and operating costs, and estimate repairs, parts and labor expenses.
Conduct routine fluid analysis
Analyzing fluids and comparing contaminant levels to normal wear rates helps identify potential problems with components before major failures. Routine fluid analysis is a proactive measure to avoid unnecessary downtime and costly repairs.
Keep good records
Comprehensive and exact records help managers predict machine productivity and operational costs, such as working hours, fuel consumption, maintenance expenses, and more. Sound information breeds sound decisions when choosing to replace or repair equipment. Maintain a vehicle history file jacket for every machine and document all maintenance and repair work.
Watch your age
The average total cost of owning and operating equipment follows a parabolic slope. Total cost decreases during the early years of machine ownership as capital costs are spread over a longer period of time. However, operating costs increase during the same timeframe, eventually leading to an increase in average total cost. The point at which the sum of ownership costs and operating costs reaches its minimum is the ideal age for operating equipment efficiently. It is crucial to stabilize fleet average age around this point in order to keep total cost of ownership down.
Rebuild vs Replace
When deciding between rebuilding and replacing a piece of equipment, use this simple formula to compare costs:
Cost to rebuild (new equipment price x .5)/equipment life (estimated hours x .75) = cost per hour
For example, a new piece of equipment that is $140,000 with an estimated life of 10,000 hours would cost $14 per hour to operate. To compare, calculate the cost to rebuild.
($140,000)(.5)/(10.000)(.75) = $9.33 per hour
If the cost to rebuild is $70,000 for an estimated equipment life of 7,500 hours, at $9.33 per hour, it is more cost effective to rebuild than to replace.
To ensure optimal performance on the job, you sometimes need to get rid of even your most trusted and longest serving heavy equipment. No matter how well you take care of and maintain your machines, they will eventually deteriorate with regular use. To minimize unexpected breakdowns, you must replace end of life equipment before the risk of failure becomes too high.
The question is, what can you do with your old machines when it comes time to part ways? You don’t want them sitting around taking up valuable space or degrading even further if they still have some value to offer you. Below are the four primary options for properly disposing of end of life equipment.
Sell it
Just because your operation is ready to stop using a piece of equipment doesn’t mean that there isn’t someone who can use it. If it is still in usable condition, you can try selling the machine directly to a buyer. The drawback to this end of life equipment disposal method is that it can take a lot of time and effort to sell directly to a buyer. You have to act as a sales rep in addition to running your operation. The other option is to contact your dealer or manufacturer and see if they are interested in purchasing it.
Trade it in
Some equipment dealers or manufacturers will gladly accept your old machine as a trade in. This route may be easier than selling, because they are used to refurbishing or remanufacturing old equipment, then reselling it. Plus, most dealers and manufacturers have an established process for reselling used equipment. While this option could help you save money on new a new machines, what you receive for your equipment will depend on what the dealer or manufacturer estimates is a fair trade in value.
Recycle or scrap it
Recycling or scrapping may be your only option if your end of life equipment is well beyond restoration and cannot be sold or traded in due to its poor condition. Although you won’t receive as much money as you would if you were selling a machine in better condition, scrap and recycling centers may help you recoup a small amount, and it is certainly a better option than leaving it to rot on your lot or behind your shop.
Auction it
If your end of life equipment is a popular model or for some reason is in high demand, then auctions can be a great alternative to selling to a dealer, even if the machine is in poor condition. Auctioning old equipment using online bidding sites requires less effort than direct selling and also broadens your reach to an extensive list of potential buyers.
Final notes
Old equipment does not need to sit idle and take up wasted space in your facility. There are ways to dispose of it while potentially recouping some of your costs. Whether you have one machine reaching its end of life or several, the options we listed will help you determine the best approach to disposing of any equipment that is no longer useful in your operations.